


Vuforia Engine is a software development kit (SDK) for creating Augmented Reality apps.
Developers can easily add advanced computer vision functionality to any application, allowing it to recognize images and objects, and interact with spaces in the real world. Another application that works in tandem with Vuforia Engine is Unity (a real-time development platform). In this guide, I will be showing you how to easily get Vuforia setup in Unity.
This guide will specifically cover:
- Adding Vuforia Engine to your Unity project/ AR App
- Setting up Vuforia Engines features
- Adding content to your project
Adding Vuforia Engine to your Project
Register as a developer
First off, you need to register for a Vuforia Developer account. It is conveniently free and you don’t need to put in any credit card information.
Download and install the Vuforia Engine Package
1. Download the Vuforia Engine Package and make sure you download the package for Unity.

2. Drag and drop this package into your Unity Project.
3. Select “Import” from the pop up dialog box.

4. Select Update if you are prompted to do so.
Vuforia Engine Setup
We now have Vuforia Engine imported into our project and therefore we can now start brining in some of its components to create an AR experience.
1. Delete the “Main Camera” from the Hierarchy.
2. Select “GameObject“ from the menu.
3. Add an ”ARCamera” from the Vuforia Engine menu.

4. Select the “ARCamera” from the hierarchy and ”Open Vuforia Configuration” from the Inspector.
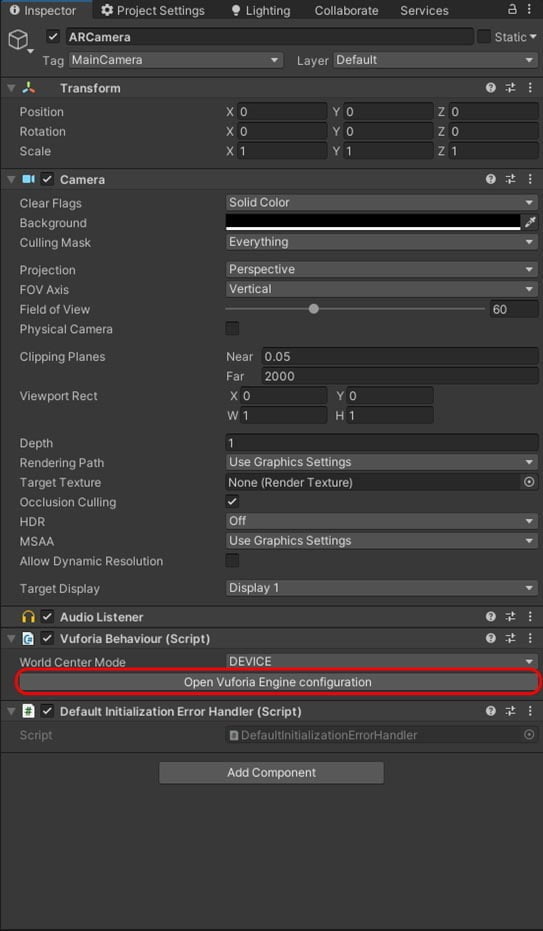
5. Add a Vuforia Development License Key in the ”App License Key” field. For a guide on getting a license key, see Vuforia License Manager
Adding Vuforia Engine Features
Vuforia offers the user many different forms of recognition that you can use to present your digital information into the real world. In this example we will use the “Ground Plane” to recognise any flat, horizontal surface in the real world. This is where you can start coming up with some creative designs.
1. Add both the “Plane Finder” and “Ground Plane Stage“ to your project

1. Select the Plane Finder in the Hierarchy.
2. Drag and drop the “Ground Plane Stage” into “Anchor Stage” of the content positioning script.
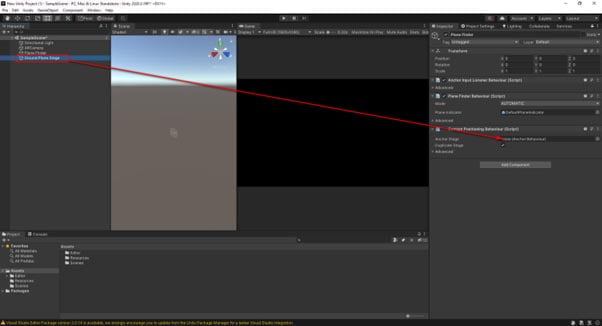
This is telling the system what we want to load onto the flat surface once a surface has been found.
Lets add an object to the scene and test to see if it is all working as it should.
1. Right Click on the “Ground Plane Stage” in the hierarchy and select “Cube” from the “3D Object” Menu item
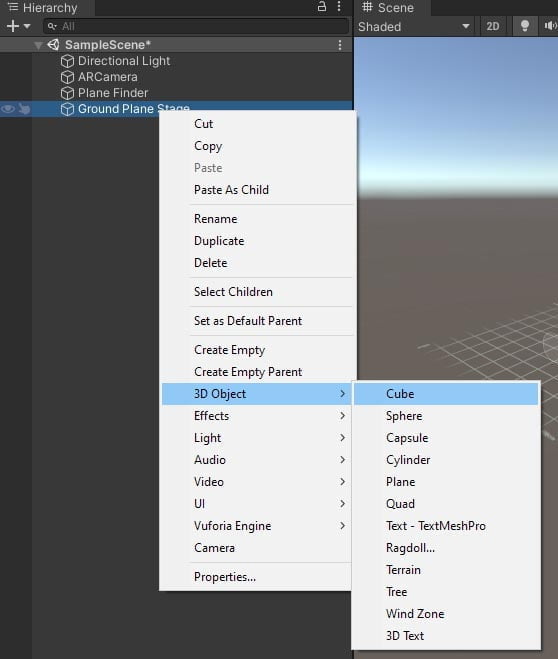
2. With the Cube selected adjust its scale to 0.1 in the X, Y and Z columns

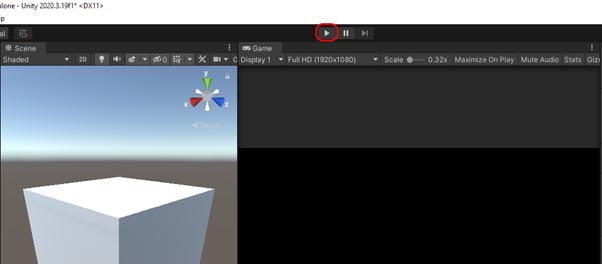
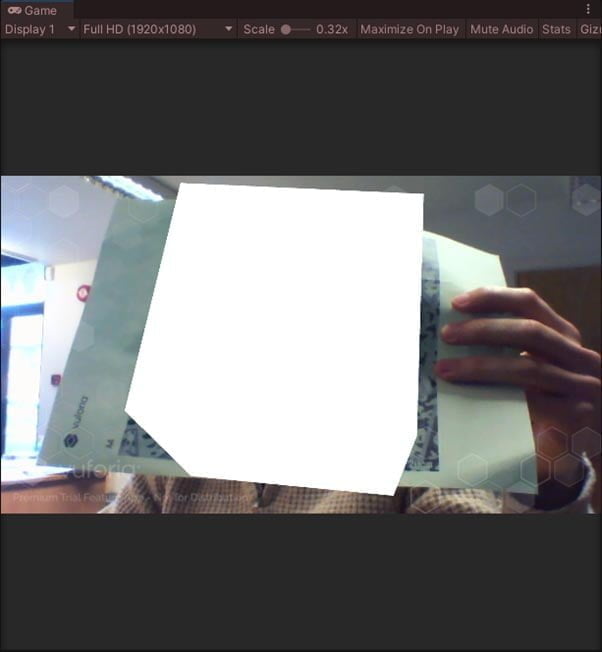
To test the Ground Plane feature with Play Mode a target must first be printed. This target is located in Assets/Editor/Vuforia/ImageTargetTextures/VuforiaEmulator/ or Download the one below which is up to date at the time of writing.
3. Select Play from the Unity Toolbar, Hold up the Print out to the webcam and you should be able to see an Identification square, this is letting you know the system has recognized a “Flat Surface”, With the mouse, click on the screen to place your content.

That’s it. You have created your first AR experience in Unity with Vuforia Engine. We have just touched the top of a very large iceberg here and there is a lot more we can do with the tools provided by PTC. Why not check out some of our other posts, or if you have some questions just let us know.
Get in touch
Do you want to know more, contact one of our experts.

